
OUR MISSION IS TO TAILOR FOR EACH CLIENT A BEAUTIFUL, FUNCTIONAL AND ENDURING OUTDOOR ENVIRONMENT THAT WILL PROVIDE A PLACE OF SERENITY FOR FRIENDS AND FAMILY TO APPRECIATE FOR YEARS TO COME.

BuildCal Landscape Hardscaping Article
Grading and Drainage Checklist Before Hardscaping
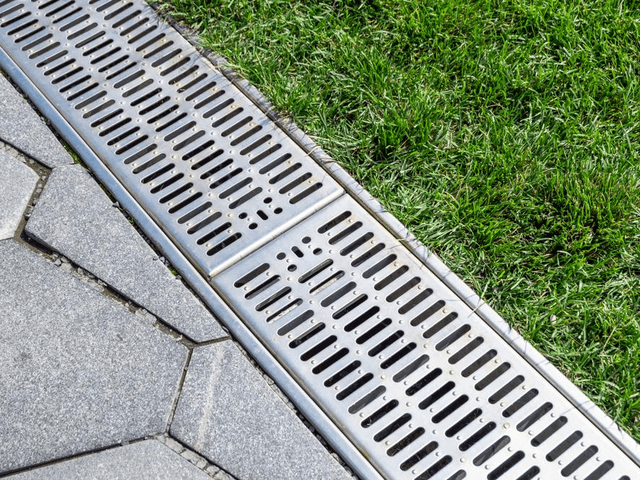
If you’re searching for a grading and drainage checklist, you’re already ahead of most homeowners in Southern California. Drainage is the “invisible” part of Hardscaping that decides whether your patio stays clean and safe—or turns into a slippery, algae-stained surface with water pooling near the house after every storm.
Hardscaping is supposed to improve your outdoor living space, not create new problems. Before you build (or rebuild) a patio, walkways, steps, or a Retaining Wall, use the checklist below to spot drainage risks early, plan the right fixes, and avoid expensive tear-outs later.
Why grading and drainage must come before Hardscaping
Hardscaping is heavy, permanent, and not forgiving. If the underlying grade is wrong, water will:
- pool on the surface (slip hazard + stains)
- push sand/joint material out of pavers
- undermine edges and cause settling
- seep toward foundations and crawl spaces
- feed moss/algae growth (especially in shaded zones)
A smart plan starts with water behavior: where it lands, where it flows, and where it must not go.
For homeowners planning patio and Hardscaping work, it helps to review a few practical planning references first, like those details .
The grading and drainage checklist before any Hardscaping
Use this as a pre-project inspection. Walk your yard after watering or rain if possible.
1) Identify the “water sources”
Check where water comes from:
- roof downspouts
- slopes from neighboring yards
- sprinklers overspraying onto Hardscaping
- AC condensate discharge
- driveway runoff
If you don’t map sources first, you’ll fix the symptom, not the cause.
2) Mark current “water destinations”
Where does water end up today?
- near doors / thresholds
- along the patio edge
- at the base of steps
- at fence lines
- beside the home’s perimeter
Take photos from the same angles. These become your before/after documentation (and make decisions easier).
3) Look for the 7 warning signs of drainage failure
This is the fastest screening test. If you have 2 or more, drainage work usually needs to happen before building.
Seven signs you need grading + drainage:
- Water pooling that lasts more than a few hours
- Green algae film on concrete or pavers
- Muddy edges around the patio perimeter
- Pavers rocking or “dipping” in spots
- Soil erosion lines (mini trenches) after rain
- Wet soil against the house or retaining edges
- Mosquito activity around damp corners
If you’re also seeing turf issues, review because lawn symptoms often reveal the same drainage problems.
4) Confirm the slope direction around the patio
A basic rule of thumb: patios should not slope toward the home. You want water guided away to a safe discharge point.
Practical check:
- Place a ball or small bottle on the surface.
- If it naturally “prefers” rolling toward the house, that’s a red flag.
5) Check edges and transitions
Most drainage failures begin at transitions:
- patio-to-lawn edge settling
- walkway-to-step junction
- patio-to-driveway seam
- paver border separation
These are the first places to crack, sink, or create puddle pockets.
6) Evaluate soil and compaction
Drainage isn’t only surface slope. It’s also what happens underneath.
- Clay-heavy soil holds water longer.
- Poor compaction causes settling, creating low spots.
- Mixed fill soil can drain unevenly and shift.
If your patio is planned as pavers, sub-base quality matters even more. Helpful background.
7) Decide which drainage approach matches your problem
Different symptoms call for different fixes:
- Water pooling on surface: regrading + slope correction + possible channel drain
- Runoff cutting across the yard: swale (shallow channel) + redirect flow
- Soggy zones near patio edges: French drain or area drain
- Downspout dumps near patio: downspout extension tied to drainage path
- Water against a slope: consider a Retaining Wall + behind-wall drainage
If you’re dealing with slopes or soil pressure, this supporting resource helps.
8) Plan a “safe discharge point”
A drain that has nowhere to go is not a solution.
A good discharge point is:
- downhill from the patio
- away from the home
- not aimed at your neighbor’s property
- protected from erosion (rock bed or outlet protection)
9) Protect your Hardscaping investment with a water plan
Once drainage is solved, Hardscaping lasts longer and needs less repair.
This is also where water-wise planning supports performance and maintenance—especially in Southern California. A useful reference.
10) Make sure drainage and Landscape Construction work together
Drainage affects every Landscape Construction decision: patio elevation, step heights, walkway grades, planter placement, and irrigation layout.
If you’re planning bigger changes than a simple surface replacement, review to align timeline, sequencing, and site prep.
Before/after examples homeowners recognize immediately
Example A: “Patio puddles + slippery green film”
Before: Water pools in two corners, algae forms in shade, furniture legs sink slightly into soft joints.
After: Surface regraded to eliminate low points, edges rebuilt to lock the perimeter, and water redirected to an appropriate drain path. The surface dries faster, stays cleaner, and becomes safer for kids and guests.
Example B: “Water runs toward the home during storms”
Before: During heavy rain, water pushes toward the back door threshold.
After: Grade corrected so runoff moves away from the home, transitions rebuilt, and a clear discharge path established. The patio becomes usable sooner after storms and reduces long-term moisture risk.
Trust signals homeowners look for (without fluff)
“We’ve been designing outdoor spaces since 2010 — over 14 years of hands-on work right here in Glendale and surrounding neighborhoods.”
“Our team includes designers and technicians certified by the American Society of Landscape Architects (ASLA) — every project we complete is documented with before-and-after photos.”
“We use trusted local materials — like California-native stone and drought-resistant plants — so your yard lasts longer and needs less maintenance.”
Pre-project questions to ask during a drainage walkthrough
Use these to keep the scope clear before Hardscaping begins:
- Where does roof water exit today, and where will it go after the patio is built?
- What’s the lowest point of the yard—and does water currently collect there?
- Are there any “hidden” low spots that only show up after rain?
- How will transitions be built to prevent edge settling?
- Will irrigation overspray land on the Hardscaping surface?
- What’s the plan for discharge without causing erosion?
- Are steps, walkways, and patios aligned so water doesn’t get trapped?
- If a Retaining Wall is needed, where will behind-wall drainage go?
- What maintenance is expected seasonally to keep drains clear?
- How will before/after photos document the outcome?
For seasonal performance, it also helps to plan maintenance early.
The simplest next step - get a drainage assessment before building
If you’re planning Hardscaping, the fastest way to avoid mistakes is to evaluate grading first—before demo, materials, and labor are committed.
Book a free drainage assessment and on-site walkthrough, then decide the right path forward with clarity.
- Call +1 (818) 303-1570 for a free drainage assessment
- If you’re planning patios, walkways, or upgrades, start here
“We’re the ONLY company in Glendale that offers:
→ A free, no-pressure personal meeting — we walk your yard, listen to you, and learn how you want to live in it
→ Custom designs for each home — no copied templates
→ Drought-resistant plants — so you save water and avoid constant upkeep
→ Guarantee on all work — we don’t just build, we make sure it lasts”
FAQ'S
I have a small yard, what works for me?
We design compact, low-maintenance yards with easy pathways, drought-tolerant plants, and soft lighting that creates a calm, welcoming feel. You won’t need to mow every week.
My yard is old and messy, can you fix it?
Yes. We specialize in reviving neglected yards — we remove weeds, rebuild paths, add new plants, and install smart irrigation. We turn a “jungle of weeds” into a peaceful retreat.
Can you install outdoor lighting?
Yes. We design lighting that highlights your favorite features — whether it’s your entrance, pool, or favorite tree. The lights are gentle, safe, and energy-efficient.
I want pathways or an outdoor patio?
Yes. We build walkways from natural stone and patios from heat-resistant pavers — all crafted by skilled hands, built to last without cracks or damage.
What makes you different from other companies?
We don’t just plant trees. We design a space where you can sit with your family, drink coffee, and relax. Every project starts with a personal meeting — we listen to you, see your space, and understand how you want to live in it.
Thinking about a new outdoor space?
We’d love to hear your ideas. Let’s explore what’s possible—no pressure, just a friendly conversation.
Give us a call:
+1 (818) 303-1570
Frequently Asked Question
CAN YOU GIVE ME AN ESTIMATE FOR MY PROJECT DURING THE INITIAL CONSULTATION?
No, Too often a landscape contractor will come to a site and immediately give a potential client a price without first knowing all the details of that project. Our first question is always, “What is this estimate based on?” Before making out a bid of any sort, we must first discuss all the work to be done, the planting and construction materials necessary, and the labor involved. After which we do a breakdown and present to you a complete and itemized preliminary estimate. As our client you will be able to see, not only how much your project will cost, but also where every dollar will go.